Every piece of clothing you own started as an idea in someone’s head before it became fabric on a hanger. Learning how to design clothes might sound like something reserved for fashion school graduates, but the truth is that anyone with curiosity, a sketchbook, and some patience can start today.
Clothing design blends creativity with practical skill. You’ll need to think about color, silhouette, and mood, but also fit, fabric behavior, and construction. The good news is that you don’t need every skill mastered before you begin. Most designers learn by sketching, experimenting, and refining their ideas over time.
In this guide, you’ll learn how to develop your design eye, sketch your ideas, choose fabric, turn a sketch into a pattern, and bring a finished garment to life. We’ll also cover tools, common mistakes, and answers to frequent questions. Grab a sketchbook and let’s get started.
Understanding Fashion Design
Before you start sketching, it helps to understand what clothing design actually involves. At its core, fashion design is the process of turning an idea into a wearable garment, and it touches several distinct skills that work together.
Design and concept. This is the creative spark: choosing a mood, a silhouette, a color palette, and an overall aesthetic. It’s where sketches and inspiration boards come in.
Pattern making. This is the technical blueprint stage, where a design gets translated into flat pieces of fabric that can be cut and assembled.
Draping. Some designers work directly with fabric on a mannequin, pinning and shaping it to create a silhouette before drafting a pattern.
Sewing and construction. This is where the garment physically comes together, using stitches, seams, and finishing techniques.
Fit and tailoring. Adjusting a garment so it fits a specific body is its own skill, often refined through trial and error.
You don’t need to master all of these at once. Many designers start with sketching and concept work, then slowly build sewing and pattern-making skills, or partner with someone who has them. Understanding the full picture helps you know where to focus your energy first.
Developing Your Design Eye
Before your first sketch, it helps to build a foundation of taste and inspiration. This groundwork shapes everything you create afterward.
Study what you love. Look closely at garments you admire, if in stores, in your own closet, or online. Notice necklines, proportions, fabric choices, and small details like stitching or buttons.
Build a mood board. Collect images, colors, textures, and even words that capture the feeling you want your designs to have. Physical boards with fabric swatches work well, and so do digital tools like Pinterest.
Learn the language of design. Familiarize yourself with terms like silhouette, drape, proportion, and color theory. Understanding these concepts helps you describe and refine your ideas.
Look at trends, but don’t chase them blindly. Trend research shows you what’s happening in the industry, but the strongest designs often come from a personal point of view rather than copying what’s popular.
Keep a running idea journal. Jot down thoughts, quick sketches, and observations whenever inspiration strikes. Some of your best ideas will come from unexpected moments.
Developing your eye takes time, and it happens alongside your first attempts at sketching. Don’t wait until you feel “ready” to start creating.
Before You Start: Setting Your Direction
A little planning before you dive in will keep your first designs focused rather than scattered.
Decide on a starting point. Are you designing for yourself, for a specific customer, or exploring pure creativity? Your answer shapes every decision that follows.
Choose a category. Trying to design everything at once can be overwhelming. Start with one category, such as dresses, outerwear, or casual wear.
Set a theme or story. A cohesive collection, even a small one, benefits from a unifying idea, if it’s a color palette, an era, or a feeling.
Consider your skill level honestly. If you’re new to sewing, start with simpler garments and looser fits. Complex tailoring can come later.
Think about your resources. Do you have access to a sewing machine, fabric store, or a local tailor? Your available tools shape what’s realistic for your first projects.
Set a small, achievable goal. A single finished garment is more valuable early on than ten unfinished sketches. Aim to complete something, even if it’s simple.
Plan for your first design-to-garment project to take anywhere from a few days to a few weeks, depending on complexity and your available time.
Supplies and Tools You’ll Need
You don’t need a professional studio to begin. Most starting supplies are inexpensive and easy to find.
Core Supplies
- Sketchbook or fashion croquis paper: pre-printed figure templates make sketching proportions easier
- Pencils, fine liners, and erasers: for sketching and adding detail
- Colored pencils, markers, or watercolors: for rendering fabric and color
- Ruler and French curve: for clean lines and pattern work
- Fabric swatches: small samples to test drape, texture, and color combinations
Helpful Additions
- Fashion design software: programs like Adobe Illustrator or free tools like Procreate for digital sketching
- Dress form or mannequin: useful for draping and checking fit
- Basic sewing machine: for turning patterns into finished garments
- Pattern paper or muslin fabric: for drafting and testing patterns before cutting your good fabric
- Measuring tape and pattern-making tools: curves, awls, and tracing wheels for more advanced pattern work
Supply Notes
Start simple. A notebook and pencil are enough to begin developing your design skills. Add tools gradually as your projects grow more complex.
Muslin is your friend. Testing a pattern in inexpensive muslin fabric before cutting your final fabric saves money and frustration.
Digital tools are optional, not required. Many successful designers still sketch by hand, so don’t feel pressured to buy software right away.
Setting Up Your Creative Process
A little structure helps turn scattered ideas into a workflow you can repeat.
Create a Dedicated Space
Even a small corner of a table works well. Keep your sketchbook, pencils, and fabric swatches within reach so you can capture ideas whenever they strike.
Build an Inspiration Library
Keep a folder, physical or digital, of images, fabric swatches, and notes. Revisit it regularly, since inspiration often builds over time rather than arriving all at once.
Establish a Simple Routine
Set aside regular time, even just 20 minutes a few times a week, for sketching or research. Consistency builds skill faster than occasional long sessions.
Learn the Croquis Technique
A croquis is a simplified figure template used as a base for fashion sketches. Learning to sketch or trace one speeds up your process, since you can focus on the clothing rather than redrawing a body each time.
Gather Your First Fabric Swatches
Visit a fabric store or order a swatch pack online. Handling different fabrics teaches you how they drape, stretch, and behave, which is difficult to learn from pictures alone.
With your space, inspiration, and a simple routine in place, you’re ready to start designing.
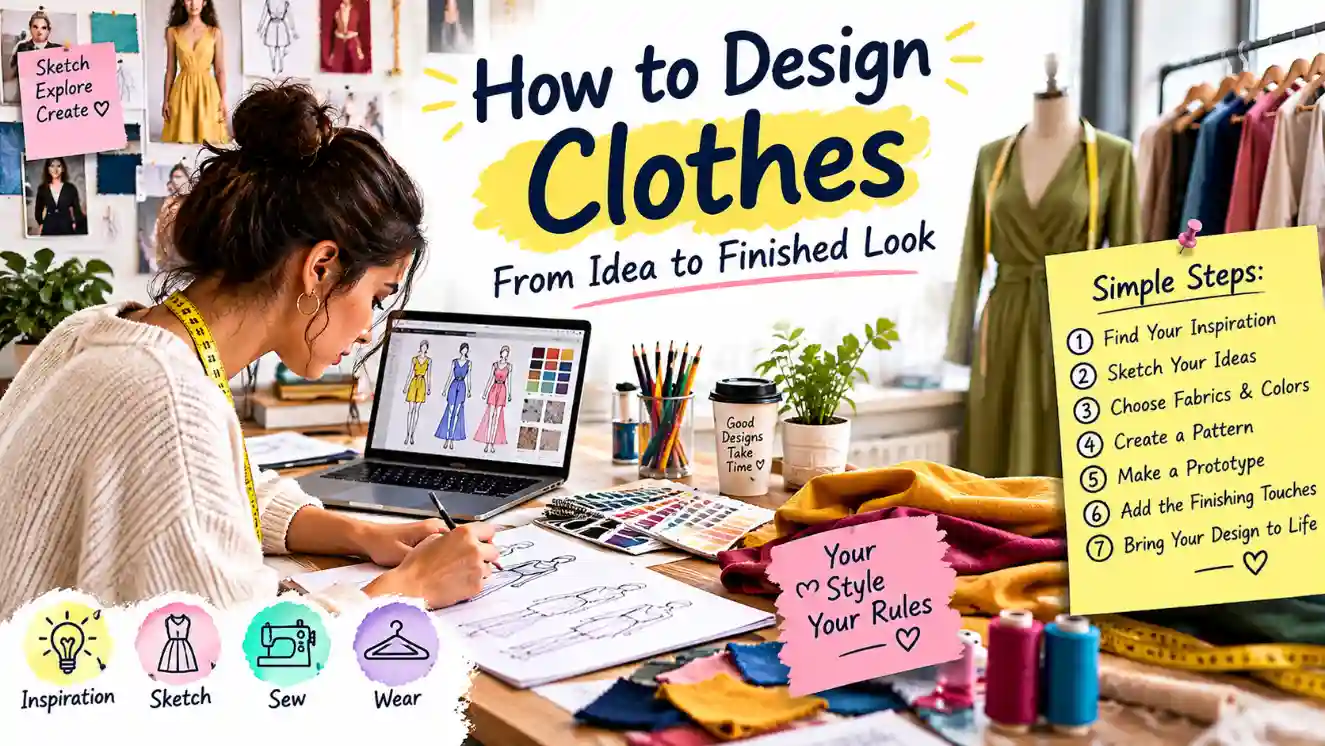
Step-by-Step: From Idea to Garment
This method walks through the core stages of turning a design idea into a finished piece of clothing.
Step 1: Brainstorm and sketch rough ideas. Fill a page with quick, loose sketches. Don’t judge them yet, just get ideas down.
Step 2: Choose your strongest concept. Review your sketches and pick the one that excites you most or best fits your goal.
Step 3: Refine the sketch. Draw a cleaner version on a croquis, adding details like seams, closures, and fabric texture.
Step 4: Choose your fabric. Select a fabric that matches the drape and structure your design needs. A stiff fabric behaves very differently from a soft, flowing one.
Step 5: Create or choose a pattern. Beginners often start by adapting an existing sewing pattern, while more advanced designers draft their own or drape fabric directly on a form.
Step 6: Make a test version (a muslin or toile). Sew a rough version in inexpensive fabric to check the fit and proportions before cutting your final fabric.
Step 7: Adjust the pattern. Fix any fit issues you find in the test version, such as tightness, length, or awkward seams.
Step 8: Cut and sew the final garment. Using your adjusted pattern, cut your chosen fabric and sew the finished piece.
Step 9: Add finishing details. Hems, buttons, zippers, and pressing give the garment a polished, professional look.
Customizing Your Approach
Once you understand the basic process, you can adapt it to fit your goals and working style.
Choosing a Design Method
- Flat sketching: drawing designs on paper, ideal for planning and communicating ideas
- Draping: working directly with fabric on a mannequin, great for fluid, organic shapes
- Flat pattern making: drafting geometric pattern pieces based on measurements, ideal for structured garments
- Digital design: using software to sketch, plan colorways, and even create tech packs for manufacturing
Adjusting for Your Skill Level
- Beginners: start with simple silhouettes, stretchy fabrics, and adapted existing patterns
- Intermediate designers: experiment with draping, custom patterns, and more structured fabrics
- Advanced designers: develop full patterns from scratch and work with tailoring techniques
Designing for Yourself vs. Designing for Others
If you’re designing for your own wardrobe, you can prioritize your personal taste and body shape. If you’re designing for other people or a future clothing line, you’ll need to think about a range of sizes, a target customer, and consistent sizing.
Building a Small Collection
If you want to move beyond single pieces, choose a unifying color palette or fabric family so your pieces feel cohesive together, even if they’re different styles.
Common Mistakes to Avoid
Many new designers run into the same handful of obstacles. Knowing them in advance can save you time and frustration.
- Skipping the test garment. Cutting your final fabric without testing fit first often leads to costly mistakes.
- Ignoring fabric behavior. A design that looks great in a sketch may not translate well if the fabric doesn’t drape or stretch the way you imagined.
- Overcomplicating your first projects. Complex designs with many pattern pieces are harder to execute well as a beginner.
- Neglecting fit. A beautiful design that doesn’t fit properly won’t feel successful, no matter how creative it is.
- Comparing yourself to professionals too early. Experienced designers have years of practice. Give yourself room to improve gradually.
- Not finishing projects. It’s tempting to jump to a new idea before completing the last one, but finishing builds real skill.
Avoiding these pitfalls will help your early designs turn out more successful and satisfying.
Growing Your Skills Over Time
Clothing design is a skill you build gradually, one project at a time.
Take Classes or Follow Tutorials
Community colleges, online platforms, and even free video tutorials can teach pattern making, sewing, and draping techniques at your own pace.
Practice Regularly
Sketch often, even when you don’t have a specific project in mind. Regular practice builds both speed and confidence.
Study Garment Construction
Take apart an old piece of clothing, or examine seams and finishes on garments you own, to understand how professionals put pieces together.
Get Feedback
Share your sketches or finished garments with others, if friends, online communities, or local sewing groups. Constructive feedback accelerates your growth.
Build a Portfolio
Keep photos of your sketches and finished garments together. Over time, this becomes a record of your growth and a useful tool if you want to pursue design professionally.
FAQs
Do I need to know how to sew to design clothes?
No, though it helps. Many designers focus on concept and sketching while collaborating with pattern makers and sewers.
What software do fashion designers use?
Common tools include Adobe Illustrator, Procreate, and specialized pattern-making software, though hand sketching remains widely used.
How long does it take to learn clothing design?
Basic skills can develop within months of regular practice, while mastering pattern making and tailoring often takes years.
Can I design clothes without going to fashion school?
Yes. Many successful designers are self-taught or learned through online courses, books, and hands-on practice.
What’s the difference between a designer and a seamstress?
A designer conceives the concept and often the pattern, while a seamstress focuses on sewing and construction, though many people do both.
Conclusion
Learning how to design clothes is a journey that rewards curiosity and patience. From your first rough sketch to a finished garment, every step teaches you something new about creativity, fabric, and fit.
Remember the key points: develop your design eye, sketch and refine your ideas, choose fabric thoughtfully, and always test your pattern before cutting your final fabric. Don’t worry about mastering every skill at once.
Start small, finish what you begin, and let each project build your confidence for the next one.
Give this process a try and share your first design in the comments. Subscribe for more beginner-friendly design and sewing guides.

Dan Brown is a passionate relationship writer and anniversary message expert at coupleanniversary. With a deep understanding of love, marriage, and meaningful celebrations, he specializes in creating heartfelt anniversary wishes, romantic messages, and thoughtful words that help couples express their emotions perfectly.